Brownie Challenge

ihamner

Expert Expediter
I am looking for a brownie recipe I can cook in the microwave. I don't mean just any recipe off the internet but something you have tried that works. Any ideas?

Also, I have the 101 grill that maybe I could cook them in but if any of you have this I would be interested if you have ever tried brownies in it. Seems like they might get too dry. We used to buy brownies at Walmart but I haven't been able to find any lately. Sometimes ya just gotta have a brownie!
 

Turtle

Administrator
Staff member
Retired Expediter
This is what I make. Intensely chocolate. It's a fast recipe, all made in a single pan, so cleanup is a snap. A true cake brownie, not a fudge brownie, but it is moist and rich, dense and chewy. It's ugly, as most microwave brownies are, which is why you want to cover them up at the end with icing or powdered sugar, or ice cream, but they taste great plain.


Ingredients

  • 1 cup sugar (var. ½ cup sugar, ½ cup packed brown sugar)
  • ½ cup unsalted butter
  • 2 eggs, large
  • 1 teaspoon vanilla extract
  • ½ cup flour
  • ½ cup cocoa
  • Optional - ¼ to ½ cup chocolate chips

Directions

  • 1. In a microwaveable pie pan or casserole dish, about 9-inches, warm the butter in the microwave to soften it, about 30-45 seconds, swirl it around to coat the pan, then cream sugar and butter together.
  • 2. Blend in the eggs and vanilla, mix well.
  • 3. Stir flour and cocoa together into the mixture, mix well.
  • 4. If desired, add up to ¼ cup chocolate chips into the mix and/or top with the chips.
  • 5. Microwave 4½ - 5 minutes. Toothpick test, ignoring any melted chocolate chips on the toothpick.
  • 6. Let sit until cool.
  • 7. Top with icing and/or sprinkles, or powdered sugar, or whipped cream or ice cream, or whatever you like.

Lots of variations with this. If you like it a little less dense, use self-rising flour, or toss in a pinch (¼ tsp) of baking powder. The eggs are a natural leavening agent, as well as a binder to hold it all together, but these will not rise at all like a cake will, or even a fudge brownie, unless you use self-rising flour or the baking powder. I prefer it without the rise. Keeps it more moist. But these are brain-dead easy to make, even a blonde can do it, so try it several ways.

Add chopped nuts, like walnuts or peanuts. Peanut butter chips instead or, or in addition to the chocolate chips, even peanut butter as an icing (see below).

The uncooked mixture can be separated out into small, individual portion containers (microwaveable plastic custard dishes are fine), about ¼ cup per serving, then sealed tightly in sandwich bags, and frozen. The individual portions will cook up in 60-90 seconds or so.

For the best taste, keep it natural. Real butter, free range chicken eggs, natural vanilla extract and high quality cocoa. You'll be glad you did.

For peanut butter icing, as well as the base for making a chocolate covered peanut desert, try this low calorie treat:
1 cup creamy peanut butter
2 cups confectioners sugar (or 1 cup regular sugar)
2 sticks of butter

Blend well. Slather brownies. Pig out.

For a chocolate peanut butter desert, melt a one-pound Hershey bar and pour it into the bottom of an 8 or 9 inch square pan, about half the chocolate. Refrigerate until firm. Spread the peanut butter mixture on top of the chocolate. Melt another one-pound Hershey bar and pour it on top of the peanut butter mixture. Refrigerate 30-45 minutes until firm. Remove from refrigerator and let warm to room temperature. Go nuts.
 

OntarioVanMan

Retired Expediter
Owner/Operator
This is what I make. Intensely chocolate. It's a fast recipe, all made in a single pan, so cleanup is a snap. A true cake brownie, not a fudge brownie, but it is moist and rich, dense and chewy. It's ugly, as most microwave brownies are, which is why you want to cover them up at the end with icing or powdered sugar, or ice cream, but they taste great plain.


Ingredients

  • 1 cup sugar (var. ½ cup sugar, ½ cup packed brown sugar)
  • ½ cup unsalted butter
  • 2 eggs, large
  • 1 teaspoon vanilla extract
  • ½ cup flour
  • ½ cup cocoa
  • Optional - ¼ to ½ cup chocolate chips

Directions

  • 1. In a microwaveable pie pan or casserole dish, about 9-inches, warm the butter in the microwave to soften it, about 30-45 seconds, swirl it around to coat the pan, then cream sugar and butter together.
  • 2. Blend in the eggs and vanilla, mix well.
  • 3. Stir flour and cocoa together into the mixture, mix well.
  • 4. If desired, add up to ¼ cup chocolate chips into the mix and/or top with the chips.
  • 5. Microwave 4½ - 5 minutes. Toothpick test, ignoring any melted chocolate chips on the toothpick.
  • 6. Let sit until cool.
  • 7. Top with icing and/or sprinkles, or powdered sugar, or whipped cream or ice cream, or whatever you like.

Lots of variations with this. If you like it a little less dense, use self-rising flour, or toss in a pinch (¼ tsp) of baking powder. The eggs are a natural leavening agent, as well as a binder to hold it all together, but these will not rise at all like a cake will, or even a fudge brownie, unless you use self-rising flour or the baking powder. I prefer it without the rise. Keeps it more moist. But these are brain-dead easy to make, even a blonde can do it, so try it several ways.

Add chopped nuts, like walnuts or peanuts. Peanut butter chips instead or, or in addition to the chocolate chips, even peanut butter as an icing (see below).

The uncooked mixture can be separated out into small, individual portion containers (microwaveable plastic custard dishes are fine), about ¼ cup per serving, then sealed tightly in sandwich bags, and frozen. The individual portions will cook up in 60-90 seconds or so.

For the best taste, keep it natural. Real butter, free range chicken eggs, natural vanilla extract and high quality cocoa. You'll be glad you did.

For peanut butter icing, as well as the base for making a chocolate covered peanut desert, try this low calorie treat:
1 cup creamy peanut butter
2 cups confectioners sugar (or 1 cup regular sugar)
2 sticks of butter

Blend well. Slather brownies. Pig out.

For a chocolate peanut butter desert, melt a one-pound Hershey bar and pour it into the bottom of an 8 or 9 inch square pan, about half the chocolate. Refrigerate until firm. Spread the peanut butter mixture on top of the chocolate. Melt another one-pound Hershey bar and pour it on top of the peanut butter mixture. Refrigerate 30-45 minutes until firm. Remove from refrigerator and let warm to room temperature. Go nuts.


You cook that in your turtlemoble???
 

Turtle

Administrator
Staff member
Retired Expediter
Absolutely. You mix it and cook it all in the same pan using just a fork. The only thing you dirty up is a fork and the pan. The pan wipes clean with a wet wipe and paper towel.
 

ihamner

Expert Expediter
Oh my goodness! This is IT!! I have to run to the store ASAP. Everything I was finding required a mixer and I do not have a mixer and all the other stuff in the truck.

Thanks soooooooo much Turtle! I can hardly wait to try it.

Linder, this needs to go in our cookbook for sure!!
 

ATeam

Senior Member
Retired Expediter
Now there's an idea for the next Expo! An in-truck-cooked brownie contest. Volunteering to be a judge here! :)
 

Wingnut

Seasoned Expediter
Here's an easy peanut butter frosting recipe to go onto your brownies:
Take a can of of frosting (white, cream cheese, chocolate, etc) and add 1/2 to 3/4 cup of peanut butter and stir well. Personally, when I'm really craving chocolate, I use a can of dark chocolate frosting and add peanut butter then slather onto a pan of nice, thick brownies. It's the best!
 

Turtle

Administrator
Staff member
Retired Expediter
Turtle brownies? That sounds like brownies with caramel and nuts. Sounds good, tho.

I worked for Fuddruckers when they were in their infancy. I was the general manager when we opened up the new store in 21st Ave in Nashville (near Vanderbilt). Way prior to the store opening I spent nearly 3 months in their R&D department in San Antonio, working on recipes and cooking methods, basically refining and adding to what they already had working in the small handful of locations at the time. That's where I came up with this recipe. They used that recipe for a long time, in larger quantities, of course. But they have recenly changed it to where they now add a little baking powder and baking soda, as well as marshmallows to the batter. They have also switched from all purpose four to Burn Flour, which is a high-gluten flour. The Burn Flour and baking powder makes it rise a lot more, and to counteract the loss of moisture that would result to keep it chewy they add in the marshmallows. It still tastes great, but I still prefer the original.

THe other claim to fame I have is that I developed (blatantly stole it from my grandmother, actually) the seasoning they use on the burgers, steaks, chicken and grilled onions. Wanna know what it is? :D
 

Turtle

Administrator
Staff member
Retired Expediter
This seasoning is great when used while cooking, but can also be used at the table. It's great for meats of all kinds, and veggies, anything with cheese (broccoli and cheese sauce with this stuff on it, man, oh, man). You can use it heavily while cooking, and at the table just like salt. I can barely eat a baked potato anymore if I don't have this seasoning for it. I've been known to take it into restaurants. Use it in stews, soups, chili. It is spicy but not hot.

I have never thought up a good name for it, so if you like, make one up. All Purpose Seasoning is lame, and Ken's Seasoning is even more lame. Most people just call it That Seasoning and everyone knows what they're talking about.

  • One-part by volume each:
    Salt
    Pepper
    Garlic
    Paprika

So simple.
OK, a few things. Fuddruckers uses it as one-part each except they only use ½-part garlic. Meaning, if you use one cup of salt, pepper, paprika, use half a cup of garlic. The ingredients, in the proper proportions, is what makes it work. At Fuddruckers we cut the garlic by half, because at one full part you have to really like garlic, as a hint of garlic flavor will come through, but at one-half part the garlic still works its magic in combination with the paprika. So, if you don't like garlic, use ½-part, cause you won't really taste it, anyway, and if you do like garlic, use one full part. Don't use more than one part, tho, as that throw things out of balance again.

This seasoning is such a simple thing, yet people always want to muck it up. Like, all the retail versions that come close to this always have something else added, like onion powder, or cayenne pepper. If you feel the need to add something, don't. Make something with this seasoning for someone and then dare them to guess the ingredients. Very rarely will you find someone that gets all four, and those who do get all four usually want to name a fifth something that's not there. It's the combination of these ingredients, in the proper proportions, that actually create something new and nearly indistinguishable from the sum of its parts.

Keeping in mind that you are using one-part each, when you use it at the table the same way you do salt, you are using ¼ of the amount of salt that you normally would, yet you will still get the same level of flavor enhancing that 4 times the salt gives you (it's a food science thing and how taste buds work). That means you can use it heavily and still not be using as much salt.

Use good quality spices. What I usually do is get those "chef bottle" Tones spices, where the they have a split lid. One side of the lip pops open for easy shaking, and the other side pops open for pouring or reaching in with a spoon. You can find these at Sam's Club, and at most restaurant supply places. You can also order these off Amazon.

You can certainly buy the same spices at most any grocery store, but they don't usually carry them in those wonderful jars. Out in the truck, smaller bottles my be preferred, and I carry a smaller bottle rather than the large ones. But I'm gonna give you how I make it at home, then you can decide what you want to do from there. You'll certainly go through more of it at home if you were there every day and cooked with it every day, than you will in the truck. I use it on practically everything, including things like burgers and chicken from Wendy's. Fries, too.

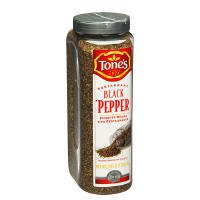
You want Restaurant Grind Black Papper, which is a power-free semi-coarse 20 mesh grind.

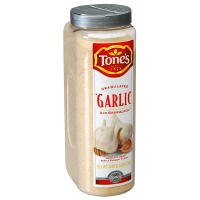
You want granulated garlic, which has is the same size as the restaurant grind pepper, as well as the same size as regular ol' Morton Salt.

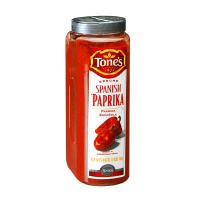
No coarse grind paprika, but that's OK, just use the dark Spanish paprika.

21Sdnz%2BGdWL._SL500_AA200_.jpg
21%2BEVKclcTL._SL500_AA200_.jpg

21Ko3nVaM2L._SL500_AA200_.jpg
salt.jpg


The commercial chef jars are about a quart each. The granulated garlic is 26 ounces, and the restaurant grind pepper and the paprika are both 15 ounces. But all three come in the same size bottle. The chef bottles should run about $8 each, give or take.

Pour the garlic, pepper and paprika into a really large bowl or tub, probably bigger than you think, or mix it in small batches. Pour enough salt into one of the containers to fill it up, which makes the salt the same one-part as the others, then dump it in. Mix it up. A bowl works best, glass is even better, because some of it will hide and not want to mix. Use a mini whisk, even your hands, just make sure it's well mixed. Use a cup and a funnel, or a steady hand, and start filling bottles. After the first three bottles (the ones that had the garlic, paprika and pepper in them), you're gonna need some more jars, cause the salt didn't come in a suitable container for this spice, so have a few smaller jars on hand, or another large one.

One year when I was broke and couldn't think of anything to give people for Christmas, I made up a bunch of these things and wrapped them up, knowing full well how lame it was. A few months later I started getting requests for refills. They said it was the best Christmas present they've ever gotten. Go figure.

A boneless, skinless breast of chicken, cooked up in a pan with plenty of butter, loaded up with this seasoning, then turn the chicken to cook the other side and load it up with seasoning again, and you've got an experience. You could open a restaurant serving that, and only that, and do well.

Mix a bunch of the seasoning into ground beef before you form the patties. You won't believe your mouth.

Cook up a cup-per-person of sea shell pasta, drain, add way too much butter and whole mess of this seasoning, and you're good to go.

If you can't find granulated garlic (should be easy, tho) or want to use garlic powder instead, fine, use it. Same with ground pepper, if fine ground is what you have, use it. It will taste the same. But, it will have a tendency to take on moisture and cake up. The paprika is bad enough about that, as the Tones paprika doesn't have any silicone dioxide added to prevent caking, and it combined with the salt can result in some caking, even when using the coarse ingredients. So, a teaspoon or so of uncooked rice grains in the bottle will take care of most of that, as it will absorb moisture before the other spices. But if your cakes up, just give it a little bang or squeeze and it's fine.

Use sparingly on rice, as even a small amount can make rice too salty. Eggs is one that you have to be careful with, too. Use sparingly. Used at the table this seasoning can overwhelm an egg, but it's not bad when cooking the eggs.
 

nobb4u

Expert Expediter
Might want to try this instead of microwave. If you don't want to go the whole from scratch I am sure the cooking method would work with regular brownie mix. Also if you have a small crock pot you could do half a box of mix and do it this way and save the other half for another time and just use one jar. Hoppe this helps I know a microwave is a lousy way to cook most anything.


Raspberry Brownies

1/2 cup butter
2 ounces unsweetened chocolate
2 eggs
3/4 cup sugar
1/3 cup seedless raspberry jam
1 teaspoon vanilla
3/4 cup flour
1/4 teaspoon baking powder


Directions:
Grease and flour two wide mouth canning jars (1 pint each). Melt the butter and chocolate over low heat.

Remove from heat, Stir in eggs, sugar, jam, and vanilla. Using a spoon, beat lightly until just combined. Stir in flour and baking powder. Pour batter into prepared jars. Cover jars tightly with greased foil, greased side down. Place jars in crockpot. Pour 1 cup water around jars. Cover; cook on high for 3 to 3 1/2 hours or until a toothpick inserted comes out clean. Remove jars from crockpot; cool for 10 minutes.

Using a metal spatula, loosen brownies from sides of jars.

Carefully remove rolls from jars. Place rolls on their sides on a wire rack; cool completely.
 
Top