2015 RAM Promaster Upfit from A to Z

westmicher

Veteran Expediter
Sounds and looks great! Now, when it's all said and done, what kind of weight can you haul? What is the empty weight as you have it set up verse the weight that is on the door frame? Right now I know that the Feds aren't stopping these vans or weighing them, but I feel soon that "revenue enhancement" time is just around the corner, and that they will be looking at us! So, how much can you haul in it?
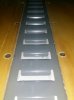
Obviously, I don't know yet. The payload weight allowed on the doorframe states 4,409 payload. So add 1 pound to that for the emblems I removed ;) and subtract probably 410 pounds for the interior I'm adding... guess away. I'm not getting into this discussion here.

This is a Promaster build thread. All you that want to argue cargo weights please start another thread!
 

brohammerllc

Expert Expediter
I apologize. I was just curious if the cost of the upgrade justified the reduction in the amount of cargo/weight hauled. The things such as e-tracks are needed to secure the load; however, some of the insulation work is for the benefit of the driver. True, it can be "justified" when it comes to the cost of operating the vehicle (less idle time; no generator). I was just wondering if the added weight was a factor that you took into consideration as to what you did for the upgrade.
 

westmicher

Veteran Expediter
I apologize. I was just curious if the cost of the upgrade justified the reduction in the amount of cargo/weight hauled. The things such as e-tracks are needed to secure the load; however, some of the insulation work is for the benefit of the driver. True, it can be "justified" when it comes to the cost of operating the vehicle (less idle time; no generator). I was just wondering if the added weight was a factor that you took into consideration as to what you did for the upgrade.
DEFINATELY!
It's all about function AND driver comfort AND cargo carrying capacity AND high efficiency AND company image/professionalism. The blend I chose is not for everyone.

It s not cheap. I would only upgrade a new van this extensively so the cost can be spread over the longest period of time.
 

Unclebob

Expert Expediter
Owner/Operator
This is quite a process because the stainless attachment screws go through tapped holes in the floor and are locknutted underneath. Finally the locknut/screw areas are hit with undercoating to prevent rust/failure years down the road.

Are the tapped holes from the factory or do you drill and tap them yourself?

If doing it yourself does tapping the sheet metal of the floor provide much benefit?


Sent from my iPad using Tapatalk
 

xmudman

Veteran Expediter
Owner/Operator
Good question. When I go steel to steel I weld it down; that's what I did with my e track.
 
Last edited:

westmicher

Veteran Expediter
I drill and tap the holes myself which holds the E-track AND plywood in place and at the proper depth until I get under the van to install fender washers and lock nuts. These machine screws hold the plywood in place as well.

There is a thick factory undercoat on Promasters that would likely catch fire if I welded the E-track to the floor. Then I would still have to attach the plywood with additional fasteners. My method gets two birds with one stone...
 
Last edited:

paullud

Veteran Expediter
I noticed that you used fiberglass insulation. Was there a reason you used that over foam?
 

westmicher

Veteran Expediter
Maybe these pictures will illustrate the super clean machine screw attachment used for both the E-track and plywood flooring... perfectly flush!
 

Attachments

  • 1423529856241.jpg
    1423529856241.jpg
    88.7 KB · Views: 141
  • 1423529870570.jpg
    1423529870570.jpg
    74.4 KB · Views: 130

westmicher

Veteran Expediter
I noticed that you used fiberglass insulation. Was there a reason you used that over foam?


You are getting ahead of me a bit... actually I use fiberglass in the irregular spaces to fill holes, cavities, lumps & bumps...

I use spray foam where I can't reasonably get the fiberglass into...

I use sheet foam insulation exclusively on the roof... glued in with spray insulation.

I do not spray the entire interior because it would make it very difficult, if not impossible, to completely trim the interior with red oak plywood, which we really think adds to the class and professionalism of of vehicles. Believe me, our clients really remember our trucks! That often makes our carrier's number the first one they call for the next load!
 

westmicher

Veteran Expediter
Here is the beginning of the roof insulation... 1" foam sheet formed and the glued between the steel roof supports, held by pressure until it drys. The steel supports will be spray foamed inside and then 1-1/2" foam sheet will run lengthwise to form 2-1/2" thick overall insulation in the roof. It will be covered with 1/4" red oak plywood to finish it off.
 

Attachments

  • 1423688750361.jpg
    1423688750361.jpg
    40.4 KB · Views: 152

asjssl

Veteran Expediter
Fleet Owner
Here is the beginning of the roof insulation... 1" foam sheet formed and the glued between the steel roof supports, held by pressure until it drys. The steel supports will be spray foamed inside and then 1-1/2" foam sheet will run lengthwise to form 2-1/2" thick overall insulation in the roof. It will be covered with 1/4" red oak plywood to finish it off.

Why not spray foam the whole inside if your going top end... a DIY kit from Menards would be $325 + -. .
 

westmicher

Veteran Expediter
The red oak makes for a nice look. Do you put any kind of clear coating on it?
Yes, Satin Polyurethane. Having tried gloss, semi-gloss, and satin we decided the satin looks WAY better over time.

I should mention that it is very important to fully coat all sides and edges on the door panels. Otherwise water eventually gets under the polyurethane and makes an ugly dark brown stain... cheap insurance to completely cover them with polyurethane.
 
Last edited:

asjssl

Veteran Expediter
Fleet Owner
I don't think I could trim out the interior with red oak sheets after that?

You can..I did paneling in mine after the complete spray foam...glad I did..you can scrape the over spray real easy..it used the Froth Pak 250
 

westmicher

Veteran Expediter
So here is an up close view of a completed floor... the E-track is perfectly flush with the plywood and is positioned over factory channels in the floor so debris can easily be blown out from the E-track so it's always easy to attach straps and bars. They are about 36" apart.
 

Attachments

  • 1423703457795.jpg
    1423703457795.jpg
    80 KB · Views: 143

westmicher

Veteran Expediter
Now the floor is completely done... along with the lower side panels... fully insulated too.

Tomorrow we start on the steel bins/supports for personal gear and supporting the mattress.

Our carrier requires a bulkhead for driver protection so that comes after the bins/supports.
 

Attachments

  • 1424298258012.jpg
    1424298258012.jpg
    43.2 KB · Views: 145
  • 1424298302895.jpg
    1424298302895.jpg
    40.3 KB · Views: 140
Last edited:

Unclebob

Expert Expediter
Owner/Operator
You're going to insulate and panel the upper part of the walls right?


Sent from my iPad using Tapatalk
 
Top