21cExp
Veteran Expediter
Installing Fan-Tastic Roof Vent On Cargo Vans
There's been a lot of conversation, and a bit of consternation, both here and on other forums about DIY installation of a roof vent in wide-ribbed roofs like on the GMC/Chevrolet and Ford cargo vans.
I've seen people go to great lengths to raise platforms or add metal panels or fiberglass etc to provide an even flat surface on which to install a roof vent so they don't have to deal with the high and low spots of a ribbed roof. None of that is really necessary if you follow the vent manufacturer's simple instructions and use some simple, common, sense.
I installed a Fan-Tastic 6000RBTA recently in my GMC van and documented the process. All images below are clickable to view the larger size.
Special thanks to Moot for reminding me of the Adohen Supply Co. website, from which you can order a variety of Fan-Tastic roof vents in various configurations (flat or dome lid in various colors, high and low profile bases, vent lock, etc). You can also add your roof thickness measurements to help ensure a better fit and less hassle in installation of the interior garnish.
As of this writing (May 2013) Adohen no longer stocks the fans in-house but sends your order directly to Fan-Tastic (who evidently does not sell directly to the public) along with any special dimensions, requirements, and add-ons. Scott, at Adohen, is a good guy to deal with, with fast response to any email inquiries.
If ordering from most suppliers other than Adohen, you pretty much get what they have in stock and have far less choice as to flat or dome, color of lid, depth of interior garnish, or lid lock, etc. You can find out more about all this on Adohen's Pictures and Dimensions page. Scroll down for the additional info.

I chose the flat lid instead of the more typical dome, as well as the low-profile base and lid-lock, because I like the lower overall profile and will be able to still take my van through my favorite car wash, as well as get into more parking garages than I might otherwise. I'd advise, though, to know your exact overall height before entering a parking garage.
You can see the interior garnish still in the box in the image above. Having carefully measured my roof thickness--from interior ceiling through insulation to van roof--I was able to order the garnish pre-cut to desired depth at no extra charge. Some have said cutting the garnish to the right height yourself is as much trouble as installing the whole vent.

Vent with interior garnish

Vent with garnish in place
Now to figure out where in the roof to install the vent. In cargo vans there are interior cross-ribs that support the roof. There is one more cross-rib and potential roof space for your new fan in the extended bodies than in regular vans, I believe.
The cross-ribs are easy to avoid. When installing my ceiling insulation and headliner, I marked the width of all supporting cross-ribs at the top of each side wall on the reinforcing band that encircles the van. I also took pictures of the roof and walls before insulation and lining so I have a clear record of all structural and support pieces. These marks and images come in handy for future van modifications.
I chose the space between the rear most cross-rib and the back doors, as in my interior configuration, and with no rear door windows, having the vent as far to the rear as possible will create the most cross-air flow through the van when the driver and passenger door windows are opened even slightly. If you have rear door windows that open, you may want to consider a more central placement for your fan, to bring air in from either or both directions.
As Fan-Tastic indicates on the included Installation Directions & Operating Instructions, slightly opening a window on the shady side of the van with the roof vent set on exhaust can create a comfortable ambient temp, even on hot days. It pays to put the vent in the right place.

Once you know where in the roof to put it, there are lots of ways to determine exact placement and where to cut the hole. The way I did it was to use the interior garnish upside down against the ceiling, so I could better gauge spacing, how far the flange would go, and the overall way it would look upon finishing. If I'm going to spend a great deal of time inside the van, I like things to look and feel balanced.
I had also placed the vent assembly with flange on top of the roof to see what kind of space it would take up, and was pleased to see there was only one "valley" I would have to bridge.
I marked the center of the van width on the ceiling inside and marked the center of the garnish, then held the garnish flange side up against the ceiling so it was even to each side and square to the rear. Then I marked the inside corners of the garnish, knowing I would have to add to the dimensions to make the hole large enough for the vent to slide in from the top. The industry standard for RV type roof vent openings is 14". The Fan-Tastic is no different, as it is made both for new installs and to upgrade older model vents.

Garnish lines with added dimension to equal 14" for hole size.

Drilling at the corners. Use a large enough bit to create a hole large enough to accept your jig-saw blade.

Ready to cut. In retrospect, I could have just drilled two holes, at opposing corners, and been able to cut the hole just fine.
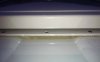
The above image can be a bit of an illusion, depending on how your mind sees it. The shadows can be deceiving with no reference point. The drilled holes are actually in the high parts of the roof, with only one valley between. As you can see, my interior measuring paid off, as the holes I drilled are evenly spaced from the edge of each roof rib.

I have a hole in my roof. Again, your eyes may say otherwise, but the valley is dead center, with a raised section to each side.

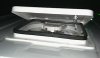
Dry fit the garnish from below. Looks good.

View from inside, with garnish in place, just dry fit, not screwed in. I like the new skylight and abundance of fresh air, but will reluctantly install the fan.

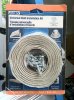
Dry fit the fan assembly without the interior garnish to check fit and clearances. The garnish piece slides up into the space between the control plate and the outer edge. Its flange will easily hide the rough cut edge of my ceiling liner. The wires will be placed up between my ceiling liner and insulation over to the side I want for future hook-up.


The interior garnish piece needs to be notched for the wiring, so it fits well when put in place from below. Easily done with a fine toothed jig saw blade or coping saw.

Dry fit garnish from below. I'm happy with the fit and look.
Time to dry fit the fan from above to check where I will need to fill with putty before screwing it down. I put the fan in and pre-drilled for the corner screws and only marked for the side screws with a slight push of the drill bit. The corner screw holes are not exactly in line with the side screw holes, they are a tad further out. Simply marking the side screw holes now, then pre-drilling them once the fan is removed ensures you don't mark up the vent cover with your drill chuck.
Note: the fan comes with standard zinc #8 flat-head screws. I put those aside and purchased stainless steel screws of the same size to prevent possible future rust stains. Some prefer to use self-drilling screws. I opted for regular and to pre-drill smaller guide holes.


Fan is now screwed down only at the corners, without any putty or sealant, so I can see how well it fits to the roof surface and where I will have to fill. Back end view, side view, and hinge view.
Note: Scott at Adohen says in some pop up campers these fans are installed with the hinge to the rear, for some reason. For cargo van installation, you want the hinge to face into the wind, that is, towards the front of the van, unless you have some other specific reason to do otherwise. Otherwise you're likely to rip the lid right off if driving when the vent is open.
As you can see, it fits rather snugly against the roof, with a minimum of space in the valley, fore and aft, to fill. That space is only about 3/16", certainly not insurmountable. Along the sides, there is next to no gap to fill as the high flat parts of the roof taper into the valleys.
I marked the outside corners and mid points along each side of the flange to guide the placement of the putty, which I want right along the outside edge of the vent flange. Then I pre-drilled the rest of the holes.
To be continued in Part Two: Installing the Putty... (next post, as it appears EO limits the number of images per post)
There's been a lot of conversation, and a bit of consternation, both here and on other forums about DIY installation of a roof vent in wide-ribbed roofs like on the GMC/Chevrolet and Ford cargo vans.
I've seen people go to great lengths to raise platforms or add metal panels or fiberglass etc to provide an even flat surface on which to install a roof vent so they don't have to deal with the high and low spots of a ribbed roof. None of that is really necessary if you follow the vent manufacturer's simple instructions and use some simple, common, sense.
I installed a Fan-Tastic 6000RBTA recently in my GMC van and documented the process. All images below are clickable to view the larger size.
Special thanks to Moot for reminding me of the Adohen Supply Co. website, from which you can order a variety of Fan-Tastic roof vents in various configurations (flat or dome lid in various colors, high and low profile bases, vent lock, etc). You can also add your roof thickness measurements to help ensure a better fit and less hassle in installation of the interior garnish.
As of this writing (May 2013) Adohen no longer stocks the fans in-house but sends your order directly to Fan-Tastic (who evidently does not sell directly to the public) along with any special dimensions, requirements, and add-ons. Scott, at Adohen, is a good guy to deal with, with fast response to any email inquiries.
If ordering from most suppliers other than Adohen, you pretty much get what they have in stock and have far less choice as to flat or dome, color of lid, depth of interior garnish, or lid lock, etc. You can find out more about all this on Adohen's Pictures and Dimensions page. Scroll down for the additional info.
I chose the flat lid instead of the more typical dome, as well as the low-profile base and lid-lock, because I like the lower overall profile and will be able to still take my van through my favorite car wash, as well as get into more parking garages than I might otherwise. I'd advise, though, to know your exact overall height before entering a parking garage.
You can see the interior garnish still in the box in the image above. Having carefully measured my roof thickness--from interior ceiling through insulation to van roof--I was able to order the garnish pre-cut to desired depth at no extra charge. Some have said cutting the garnish to the right height yourself is as much trouble as installing the whole vent.
Vent with interior garnish
Vent with garnish in place
Now to figure out where in the roof to install the vent. In cargo vans there are interior cross-ribs that support the roof. There is one more cross-rib and potential roof space for your new fan in the extended bodies than in regular vans, I believe.
The cross-ribs are easy to avoid. When installing my ceiling insulation and headliner, I marked the width of all supporting cross-ribs at the top of each side wall on the reinforcing band that encircles the van. I also took pictures of the roof and walls before insulation and lining so I have a clear record of all structural and support pieces. These marks and images come in handy for future van modifications.
I chose the space between the rear most cross-rib and the back doors, as in my interior configuration, and with no rear door windows, having the vent as far to the rear as possible will create the most cross-air flow through the van when the driver and passenger door windows are opened even slightly. If you have rear door windows that open, you may want to consider a more central placement for your fan, to bring air in from either or both directions.
As Fan-Tastic indicates on the included Installation Directions & Operating Instructions, slightly opening a window on the shady side of the van with the roof vent set on exhaust can create a comfortable ambient temp, even on hot days. It pays to put the vent in the right place.
Once you know where in the roof to put it, there are lots of ways to determine exact placement and where to cut the hole. The way I did it was to use the interior garnish upside down against the ceiling, so I could better gauge spacing, how far the flange would go, and the overall way it would look upon finishing. If I'm going to spend a great deal of time inside the van, I like things to look and feel balanced.
I had also placed the vent assembly with flange on top of the roof to see what kind of space it would take up, and was pleased to see there was only one "valley" I would have to bridge.
I marked the center of the van width on the ceiling inside and marked the center of the garnish, then held the garnish flange side up against the ceiling so it was even to each side and square to the rear. Then I marked the inside corners of the garnish, knowing I would have to add to the dimensions to make the hole large enough for the vent to slide in from the top. The industry standard for RV type roof vent openings is 14". The Fan-Tastic is no different, as it is made both for new installs and to upgrade older model vents.
Garnish lines with added dimension to equal 14" for hole size.
Drilling at the corners. Use a large enough bit to create a hole large enough to accept your jig-saw blade.
Ready to cut. In retrospect, I could have just drilled two holes, at opposing corners, and been able to cut the hole just fine.
The above image can be a bit of an illusion, depending on how your mind sees it. The shadows can be deceiving with no reference point. The drilled holes are actually in the high parts of the roof, with only one valley between. As you can see, my interior measuring paid off, as the holes I drilled are evenly spaced from the edge of each roof rib.
I have a hole in my roof. Again, your eyes may say otherwise, but the valley is dead center, with a raised section to each side.
Dry fit the garnish from below. Looks good.
View from inside, with garnish in place, just dry fit, not screwed in. I like the new skylight and abundance of fresh air, but will reluctantly install the fan.
Dry fit the fan assembly without the interior garnish to check fit and clearances. The garnish piece slides up into the space between the control plate and the outer edge. Its flange will easily hide the rough cut edge of my ceiling liner. The wires will be placed up between my ceiling liner and insulation over to the side I want for future hook-up.
The interior garnish piece needs to be notched for the wiring, so it fits well when put in place from below. Easily done with a fine toothed jig saw blade or coping saw.
Dry fit garnish from below. I'm happy with the fit and look.
Time to dry fit the fan from above to check where I will need to fill with putty before screwing it down. I put the fan in and pre-drilled for the corner screws and only marked for the side screws with a slight push of the drill bit. The corner screw holes are not exactly in line with the side screw holes, they are a tad further out. Simply marking the side screw holes now, then pre-drilling them once the fan is removed ensures you don't mark up the vent cover with your drill chuck.
Note: the fan comes with standard zinc #8 flat-head screws. I put those aside and purchased stainless steel screws of the same size to prevent possible future rust stains. Some prefer to use self-drilling screws. I opted for regular and to pre-drill smaller guide holes.
Fan is now screwed down only at the corners, without any putty or sealant, so I can see how well it fits to the roof surface and where I will have to fill. Back end view, side view, and hinge view.
Note: Scott at Adohen says in some pop up campers these fans are installed with the hinge to the rear, for some reason. For cargo van installation, you want the hinge to face into the wind, that is, towards the front of the van, unless you have some other specific reason to do otherwise. Otherwise you're likely to rip the lid right off if driving when the vent is open.
As you can see, it fits rather snugly against the roof, with a minimum of space in the valley, fore and aft, to fill. That space is only about 3/16", certainly not insurmountable. Along the sides, there is next to no gap to fill as the high flat parts of the roof taper into the valleys.
I marked the outside corners and mid points along each side of the flange to guide the placement of the putty, which I want right along the outside edge of the vent flange. Then I pre-drilled the rest of the holes.
To be continued in Part Two: Installing the Putty... (next post, as it appears EO limits the number of images per post)
Attachments


Last edited:


